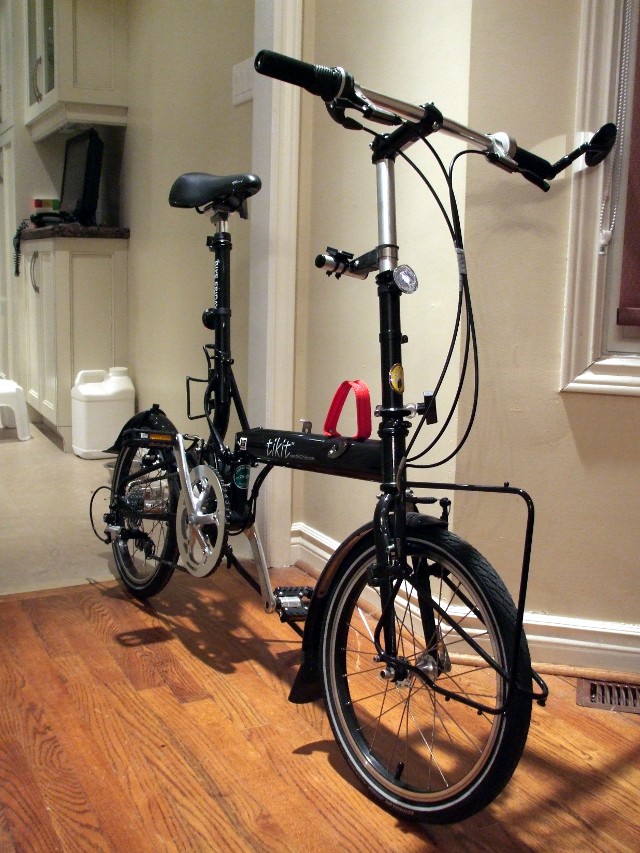
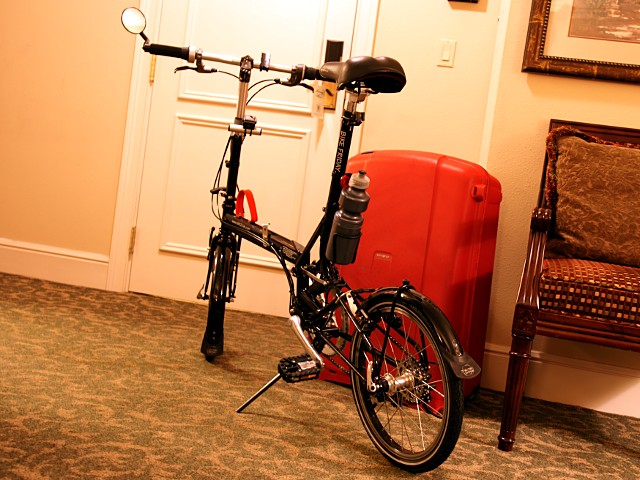
Step 1: Get a folding bike. Mine is a Bike Friday Tikit. This bike has a million options, from the most basic Model T (the one I have) all the way up to a fully tricked-out road bike with drop handlebars, lots of gear inches, and just about any component choice you could imagine. The hyperfold model folds in five seconds. I don’t have that one, so my Tikit takes a full 15 seconds to fold. The best thing about the Tikit is that although it looks weird and the wheels are tiny (just sixteen inches), it feels and rides like a normal-sized bike. My riding position on this bike is basically the same as on my mountain bike, which is perfect for commuting and tootling around the city. But don’t take my word for it, get yourself to Urbane Cyclist and give one a test ride for yourself.
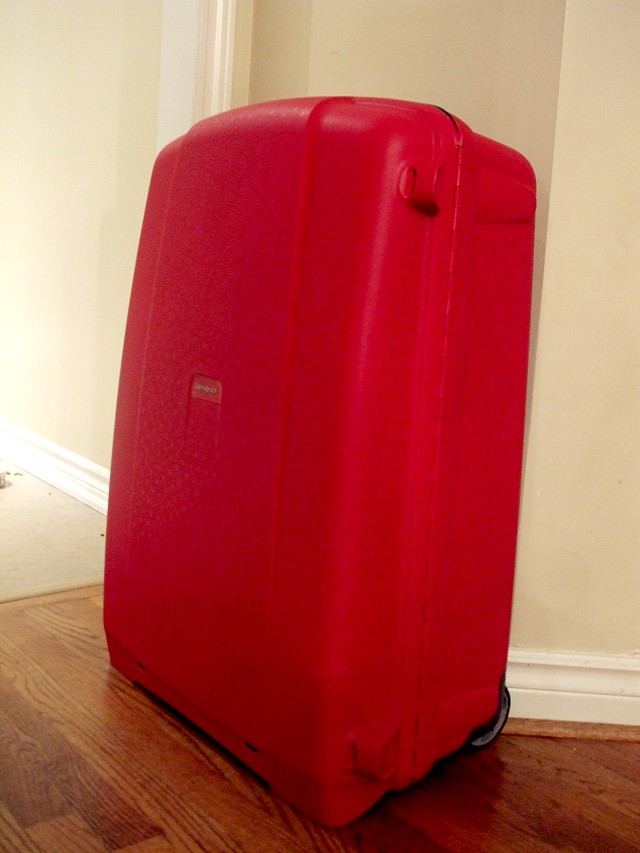
Step 2: Get a suitcase that your folded bike will fit into. The 30″ Samsonite F’Lite GT is the case that Bike Friday designs their bikes to fit into, so it seemed like a good choice. With only minor disassembly (one wheel removed and a half-dozen bolts loosened or removed), the bike fits neatly into the case with lots of room left over for a repair kit, pump, locks, and other cycling gear. Because the bike is designed to fit into a suitcase, there’s no guesswork involved; the manual shows the packing process in detail, right down to the correct way to orient the cranks. I didn’t manage to squeeze my helmet in, but I’m sure I could with a bit of practice. Practice could also get my packing time down from around 45 minutes the first time to maybe 15.
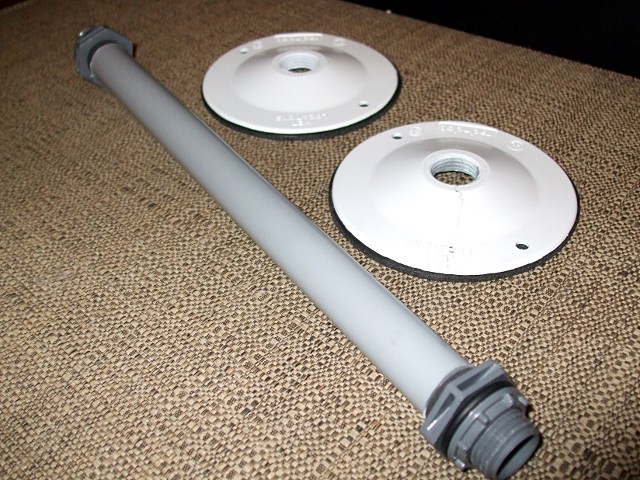
Step 3: Get a crush protector to keep the side of the suitcase from collapsing on your fragile bike. Even a hard-sided suitcase like the F’Lite has a lot of give in it and given the way that baggage handlers toss luggage around, it would be pretty easy to end up with a bent wheel or chainring after a flight. The crush protector is just a support that keeps the sides of the suitcase from compressing, ensuring that there’s never any weight bearing down on the sensitive bits of the bike itself. Bike Friday sells crush protectors for $7, or you can make your own for about the same cost from parts available at any hardware store with a decent stock of electrical supplies. That meant Home Depot for me.
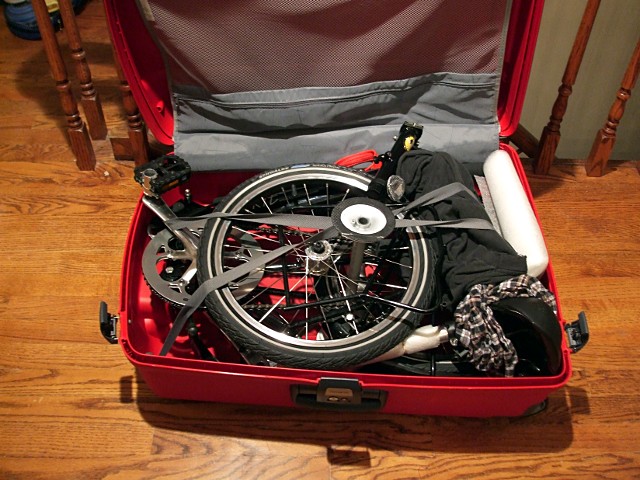
Step 4: Pack the bike in the case, following the instructions in the manual. Bike Friday sells packing kits that include little fabric bags and sleeves to help protect the sensitive bits, but I found that a short length of packing foam, some old rags, and a few elastic bands did the same job.
Step 5: Check your bike at the airport, now indistinguishable from any other piece of luggage, and laugh at those ridiculous charges for bike boxes that airlines love to charge.
Step 6: Unpack at your destination. It only took me about 20 minutes to unpack and reassemble. I didn’t do too badly for my first-time packing: the rear reflector was broken in transit, but everything else survived without a scratch.
Step 7: Have a good ride!
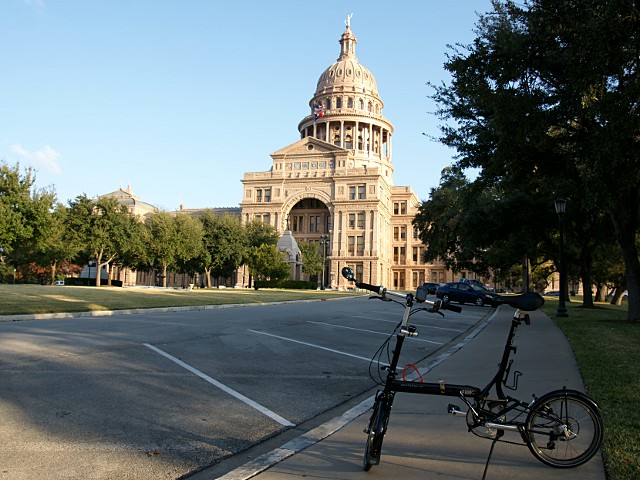
So I’m in Austin, Texas at the moment, midway through a week of working hard, eating meat, and riding a bit. The Texas Capitol is about 2200 km from home, or a much more reasonable 10-minute ride from my hotel. Work commitments are keeping my exploring to a minimum, but I’m trying to get as much in as I can. There’ll be some more random posts about Austin in the days ahead.