After considering a variety of costumes for my workplace Halloween celebrations (held on Friday last week), I decided to dress up as a car driver. I mean, what better costume could there be for a cyclist? I figured that it would be an easy enough costume to make and wear, given that drivers look (more or less) like normal people. For inspiration, my mind went to a time when driving was glamorous instead of a dehumanizing chore. I decided that I’d try to look like I was driving a roadster in the 1920s. It was still a pretty simple costume, requiring just an aviator’s hat, some goggles, and a long white scarf. This is what I came up with after poking around the closet for the scarf, Etsy for the hat, and Lee Valley Tools (of all places) for the insanely great goggles:
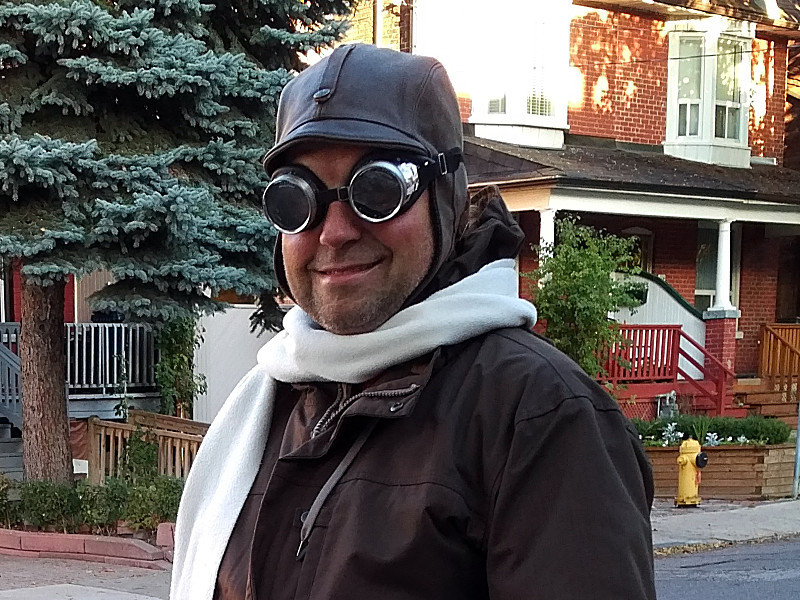
Val as old-time car driver
All that was left was the car. Now obviously, I don’t have an old roadster lying around, so I had to buy or make one that I could take to work for costume day. Oh, and did I mention that I wanted to make the 10 km commute by bike, the way that I always do? Three weeks, eight trips to Home Depot, three visits to Lee Valley, and two online orders later, this is what I ended up with:
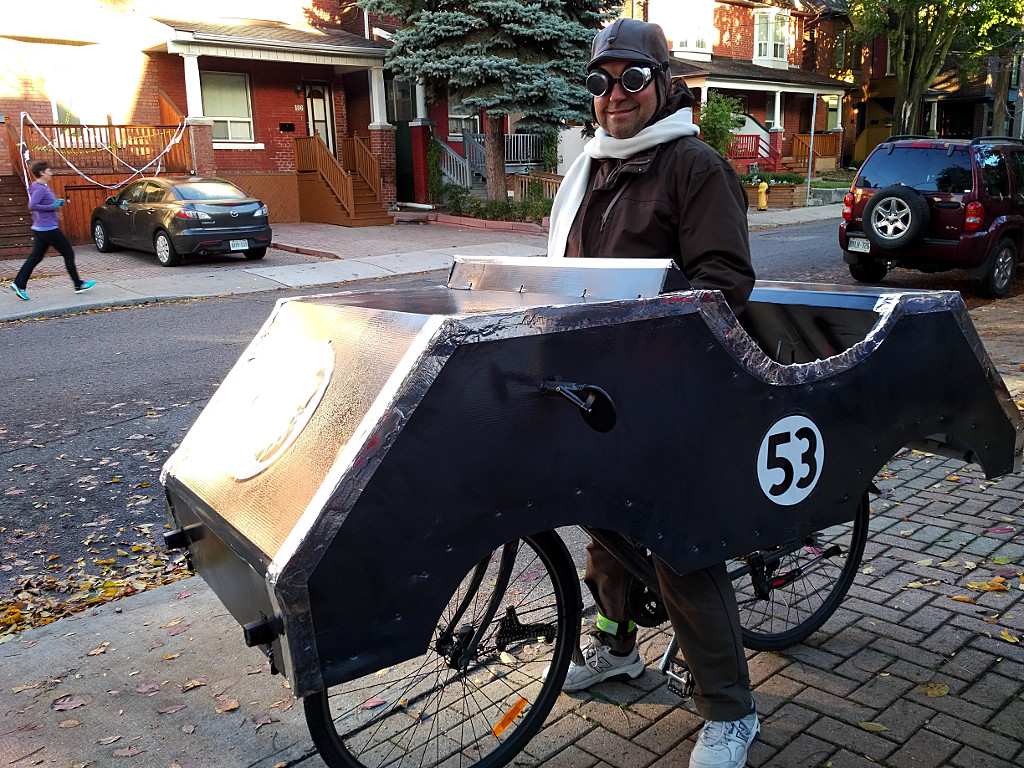
Val’s retro roadster
Here’s the full story.
I i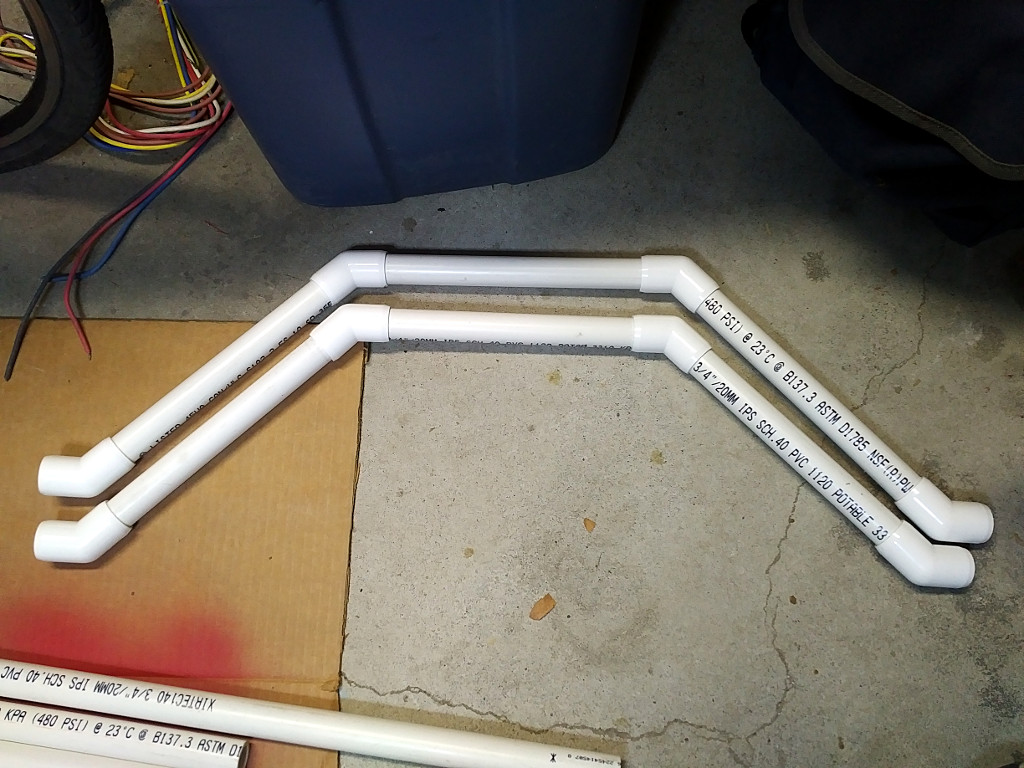 nitially came up with the concept in mid-September, but didn’t start work until around Thanksgiving. With only the vaguest idea of how to turn the vision into reality, I considered a bunch of different construction approaches, including using plain cardboard boxes, a lightweight wood frame, and even thin sheet metal. I eventually settled on lightweight PVC pipes as the frame material with corrugated plastic for the body. Home Depot sells the pipes, but their selection of pipe connectors is underwhelming. It’s almost as if they expect people to make plumbing runs with the stuff, not build neat things. Weird. That’s not the case at Lee Valley, where they sell a variety of PVC connectors specifically for building things. I picked up a few samples for an experiment. I started with a rough pass at forming basic wheel wells and mocking up portions of a car body that would fit around my bike while leaving the handlebars with enough room to manoeuvre. With the proof of concept roughed out, I bought the rest of the frame materials I’d need:
- 5x 3/4″ x 10′ PVC pipes
- A variety of elbows, tees, 3- and 4-way branches, and other PVC connectors
- A bottle of PVC glue
Most of the pieces for the frame were cut by eyeballing rough dimensions rather than by measuring. I did all of one side first, then used those pieces as templates to cut the other side. Six crosspieces would join the two sides together. With the main frame pieces cut, I did a dry fitting just to ensure that it would all go together the way that I thought it would:
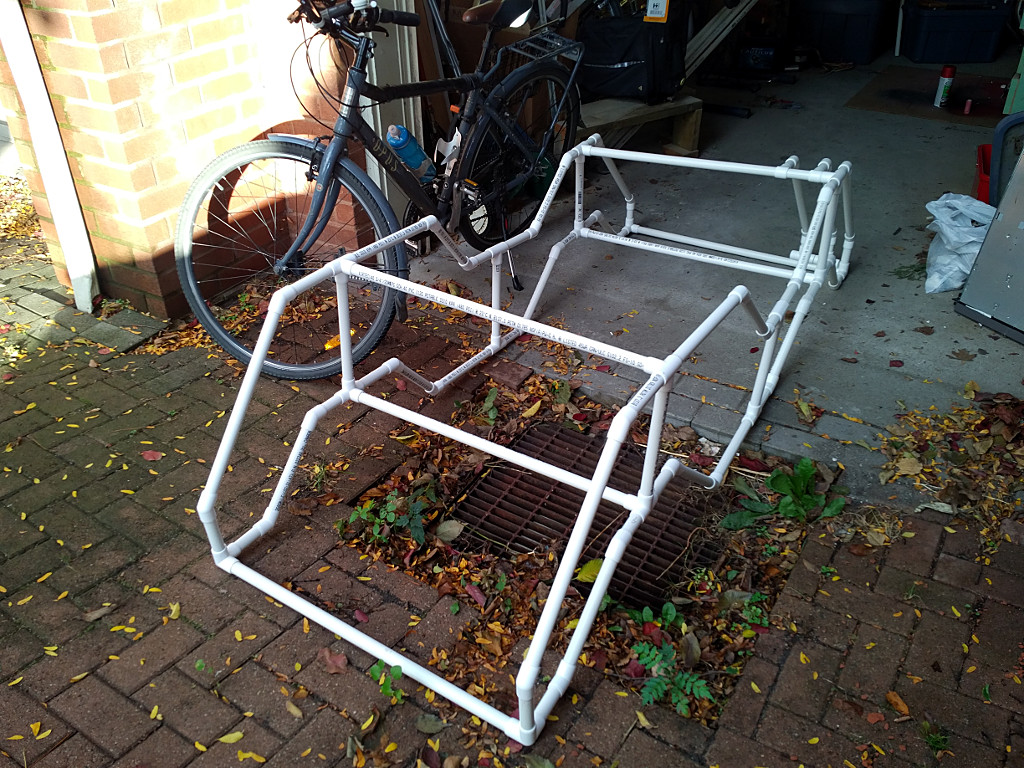
Proof of concept: success!
With the dry fit worked out, I assembled and glued the frame, carefully making sure that the two sides matched. With both sides finished, I glued in the six crosspieces and had my finished frame. Time to get supplies for the body:
- 2x 48×96″ corrugated plastic panels (my local store only had 1 large panel, so I ended up getting 1 large panel and 4x 48×24″ ones)
- 200x #8×1/2″ self-tapping metal screws
I cut each panel a little oversize, screwed it onto the frame, and then trimmed to size with a utility knife. It would have been easier and neater to use a router with a flush trim bit, but I was pressed for both time and supplies.The wheel and cockpit openings were cut freehand for that homemade look. I smoothed over the joints between panels with two coats of leftover drywall compound from an old reno project. Paintable caulking or wood filler would have worked just as well; I was just using what I had on hand. The body was coming together:
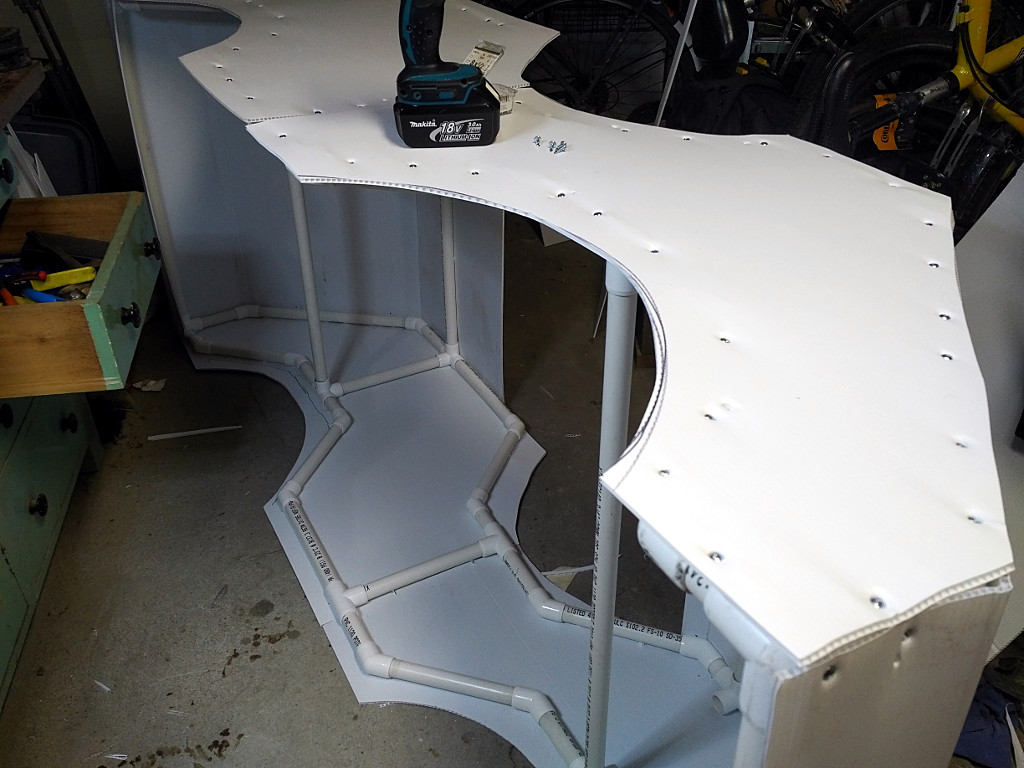
Body panels screwed onto the frame.
During the build phase, I’d been experimenting with various finishes on the corrugated plastic. I discovered that paint alone offered little adhesion and poor coverage; 2-in-1 primer + paint was only a little better. I ended up with a base of automotive primer and two coats of metallic “hammered” spray paint. I liked the end result. The joints still looked pretty rough and my Halloween ride was less than 12 hours away, so I ran aluminum tape along the sides to cover up the rough patches. The unpainted aluminum gave the whole thing an industrial look.
I used contact cement to stick on my racing numbers (53!) and a fake licence plate, cut out four slots to attach my bike headlights and tail lights to the frame, and used a hose clamp to attach a mirror mount to the driver’s side. It was all ready! Just ten hours before my Halloween ride to work and the car was basically done. All that remained was the small detail of trying to mount it on my bike!
I’d already figured out how I’d connect the frame to my bike (in theory at least), so I gathered my supplies:
- Some 2″ hose clamps
- A 1×48″ aluminum tube (left over from my bike trailer build many years ago)
- Some industrial-strength cable ties
I used cable ties and hose clamps (for redundancy) to secure the aluminum tube to my bike’s top tube, extending it out like a spar over my front wheel:
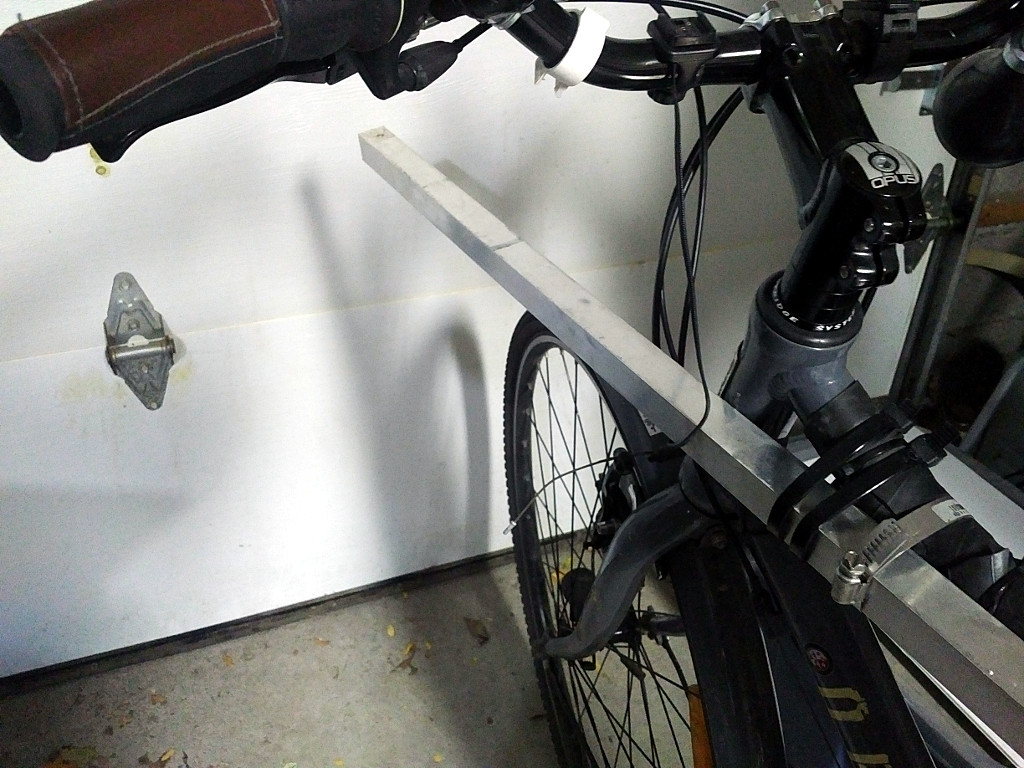
Aluminum tube spar mounted out over the front wheel
I then lifted the car body so that the front crosspiece rested on the aluminum tube and the rear crosspiece sat across my rack. I tied the car frame to my bike rack and the aluminum tube with more cable ties and hose clamps:
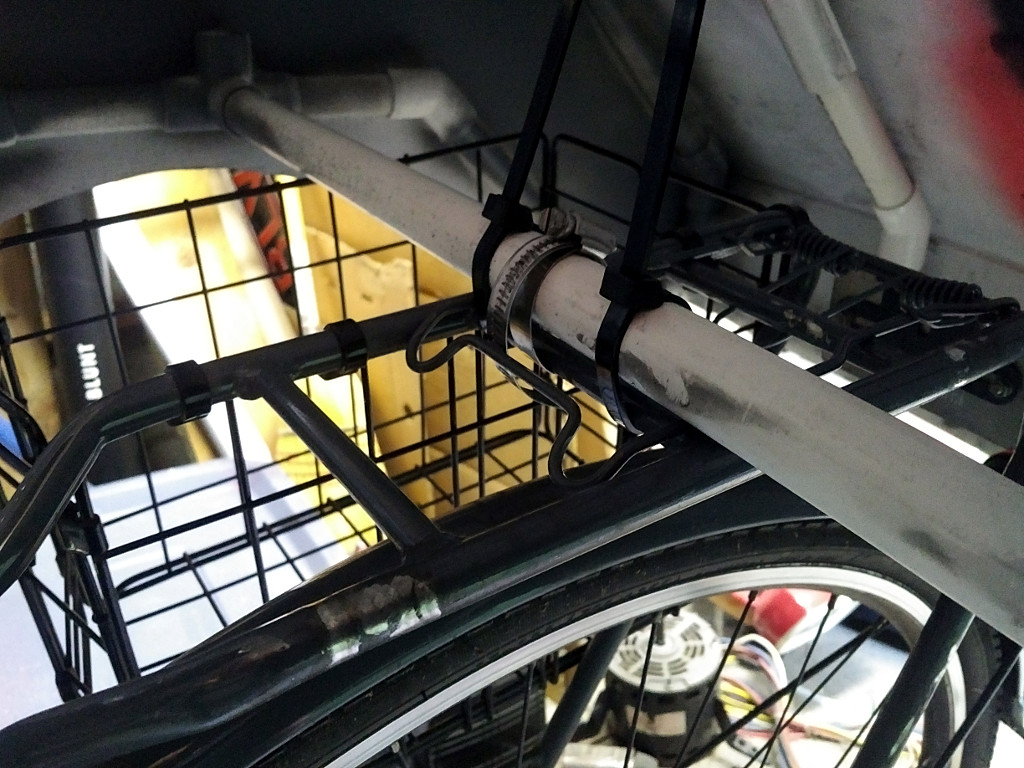
Heavy duty cable ties and a hose clamp secure the rear crosspiece to my rear cargo rack. That rack has had a lot of cargo lashed to it but never a car before now!

Two heavy duty cable ties secure the front crosspiece to the spar mounted on my top tube.
It was time to wrap up and go to bed so that I could make my ride in the morning. I still had no idea how it would handle, how I’d be able to get on or off my bike, or even if it would survive the 10 km ride to work in the morning. Whelp, one problem at a time. I packed a field repair kit including extra cable ties, hose clamps, and a couple of short lengths of pipe I could use to splint a break, then went to bed, dreaming of driving to work the next day.
I wheeled outside in the morning, with Risa laughing all the way; it was the first time she’d seen the finished product. After some difficulty getting into the car (eventually solved with the help of a step stool), I posed for some pictures and then wheeled around in a short oval on my street to see how it would handle. Yes, not five minutes before I embarked on a 10 km ride with this contraption, I was trying out my new car for the very first time. Until that point, I wasn’t even certain that it would be rideable, never mind hold together for a half-hour ride through downtown to the west end without falling apart.
As I pedalled around, I realized that the frame was a little bouncier than I’d expected. Any sort of quick movement was enough to create a shimmy from side-to-side that I could already tell would be difficult to control at speed. It was also the first time that I’ve ever ridden a bike without being able to see my hands or the front wheel. It’s a lot weirder than you might think it is. But my quick little oval was enough to convince me that I’d probably get to work in one piece. The ride home may be another story, but one thing at a time.
So off I went, rolling down the street, onto the Bloor Viaduct, and across town to work:
First test ride!
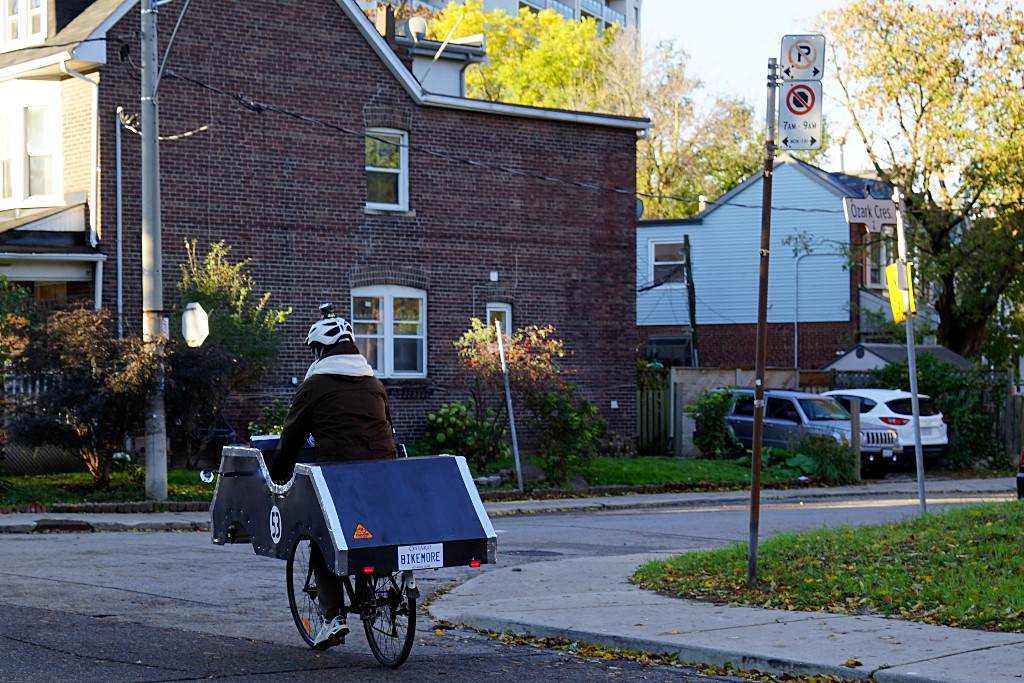
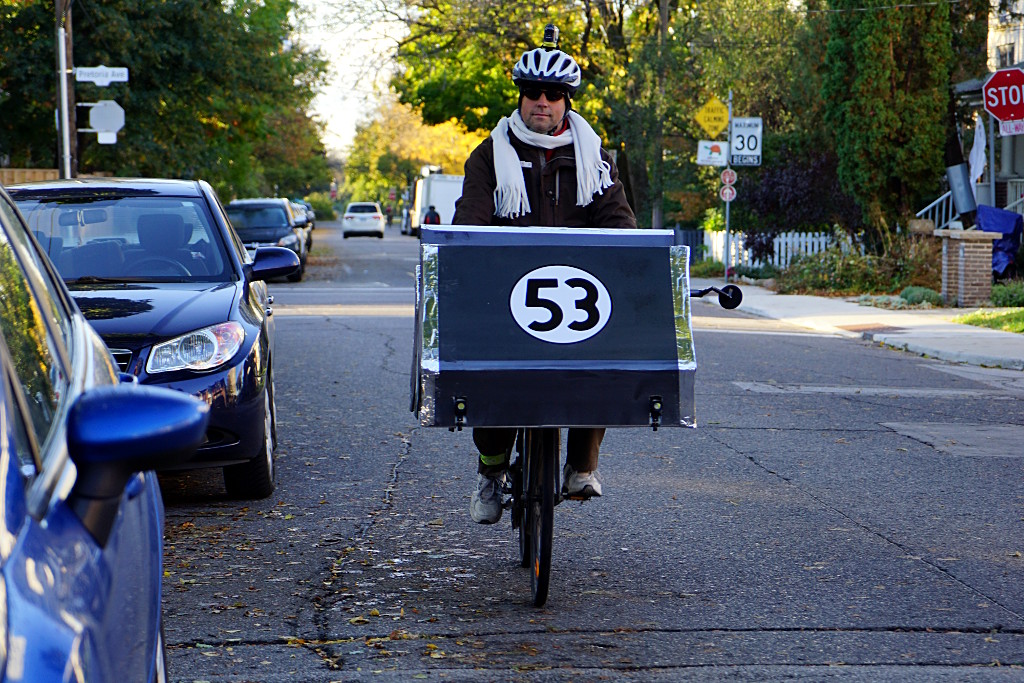
On my way to work in the car
In the couple of minutes it took me to get onto and across the Viaduct, the handling was starting to settle down and I felt much more at home behind the dashboard. By the time I got to Sherbourne, I was comfortable enough with the handling to merge into traffic. While I waited for the light at Spadina, a local Redditor snapped a picture that topped /r/toronto for the rest of the day:
The ride to work took just 5 minutes longer than usual; most of that was because I was stuck in traffic instead of being able to filter through jams like cyclists normally do. Some of the comments that I got along the way:
- Construction worker: “Coming through, number 53!”
- Cafe worker who rushed to the door: “I love your bike!”
- Cyclist #1: “Amazing!”
- Cyclist #2, warily looking me up and down: “How’s that working for you?” (It turns out that he thought that I rode like this every day!)
- Mother to her young son: “It’s his car, but it’s a bike!”
- Virtually every other reaction I heard: “Hahahahaha!” or “Wooo!”
I wheeled in through the double doors at work, dismounted, and parked in the bike parking area. And then, like any other driver, I went to my desk looking like a completely normal person for the rest of the day.
If I do something like this again, I’ll change a few things:
- Make it a bit narrower to fit through doors. My overall constructed width was 33 inches (not including the mirror & mount), just a touch too wide to fit through standard doorways. There was enough clearance between my handlebars and the sides of the car that I could have narrowed it down to a more door-friendly 31″.
- Apply the aluminum tape earlier and prime/paint over it. Deadlines make compromises. I like the industrial look, but it’s not quite what I’d originally envisioned.
- My original design and construction allowed for a working trunk, but time constraints prevented me from finishing it. I will probably complete the trunk before any subsequent public appearances.
And yes, my car did survive the trip to and from work with no mechanical problems. If you’re wondering, the total weight of the car is a bit under 30 pounds. It’s by far the bulkiest thing I’ve ever carried on my bike, but not even close to the heaviest. Good times.

Like all motorists, I have to learn to text and drive.
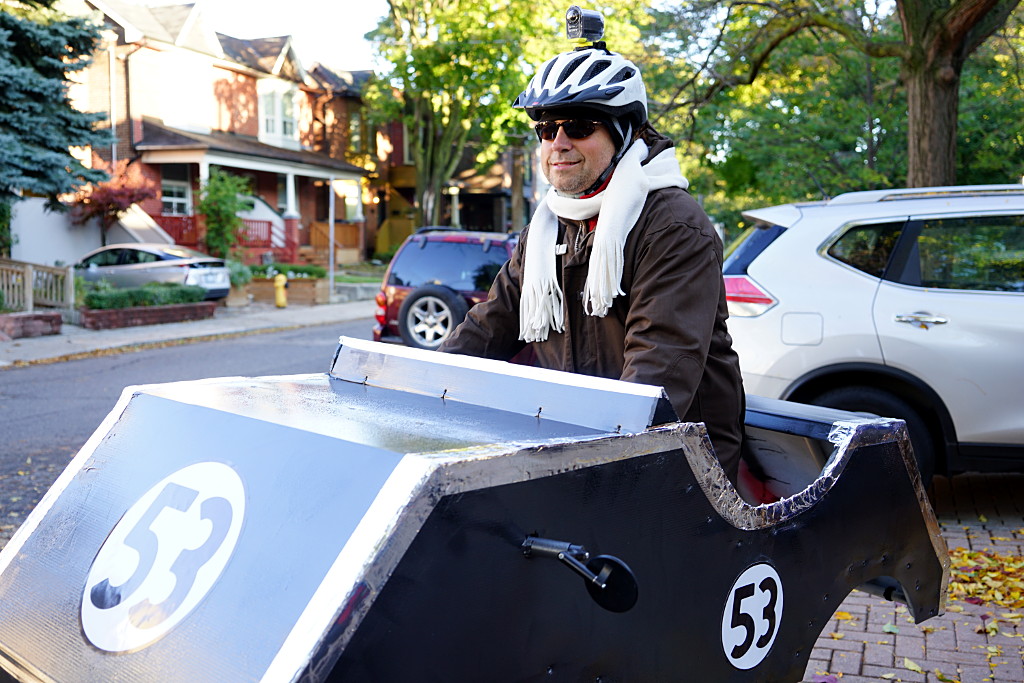
In the cockpit and ready to go.
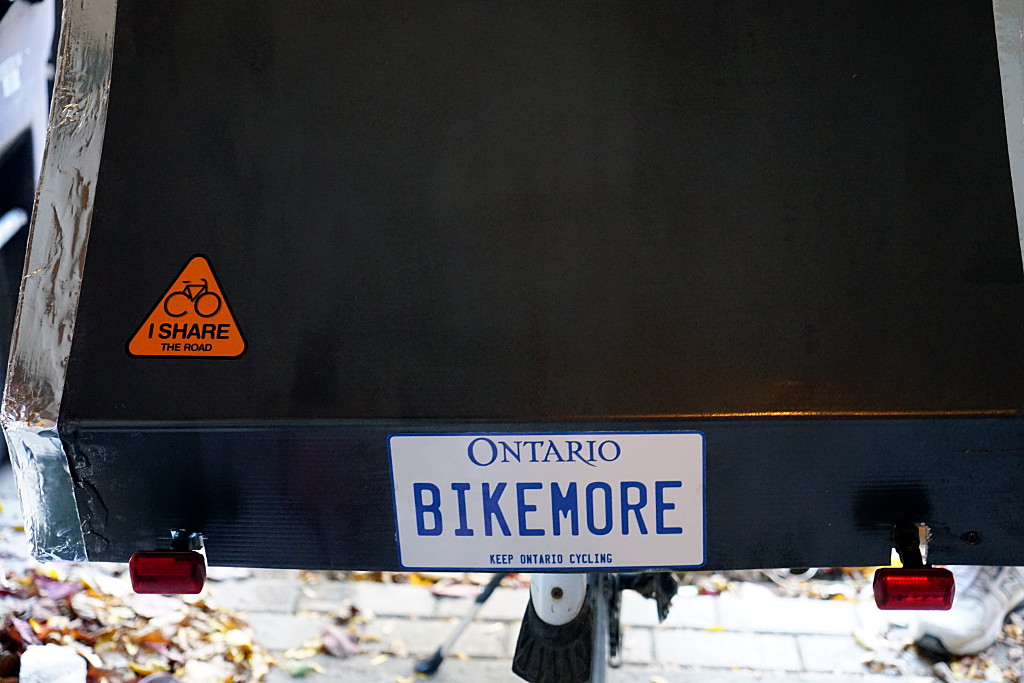
Tail lights, licence plate, and bumper sticker
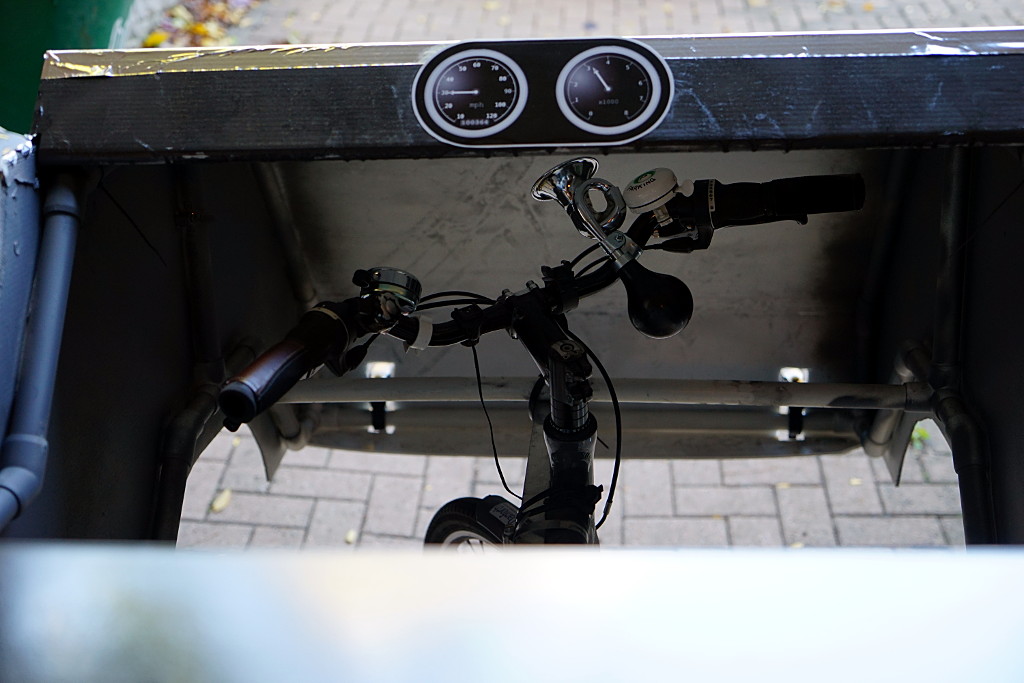
Inside the cockpit
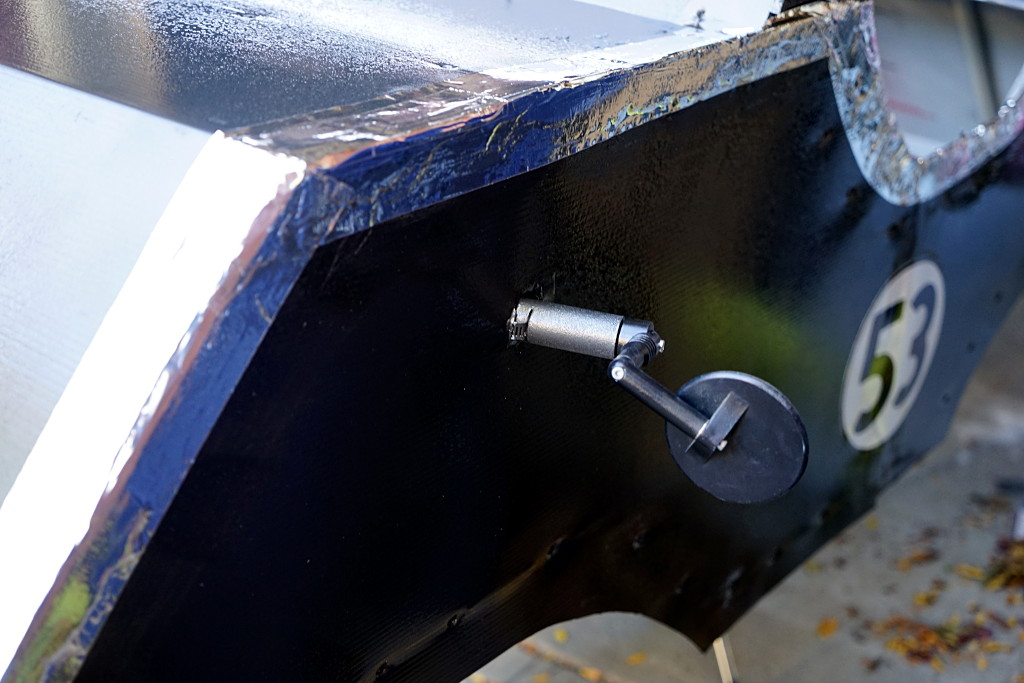
Exterior mount for my trusty mirror (never drive a car or bike without one!)
Right on Val. I believe you’ve got a template which you can really build on: windshield, mock wheels, swinging door — getting in must require some careful contortions — etc.
Of course, this velo-car needs a name. How about the Dodge Val-o-city!!! Ok, maybe not.
Awesome awesome awesome!